
- Updated 1/5/22: Added more specific info regarding manual P5R patching.
With ShrineFox.com’s PS4 Update Creator, you can now add support for loading modded files, alongside other handy tweaks, to any of the following games.
- Persona 3 Dancing (CUSA12636, USA)
- Persona 4 Dancing (CUSA12811, EUR)
- Persona 5 Dancing (CUSA12380, USA)
- Persona 5 Royal (CUSA17416, USA / CUSA17419, EUR)
In the past, users were instructed to use an outdated build of the Mod Compendium to generate a .PKG for P5R. Since then, Lipsum (aka zarroboogs) has updated his patches to include P3D/P4D/P5D.
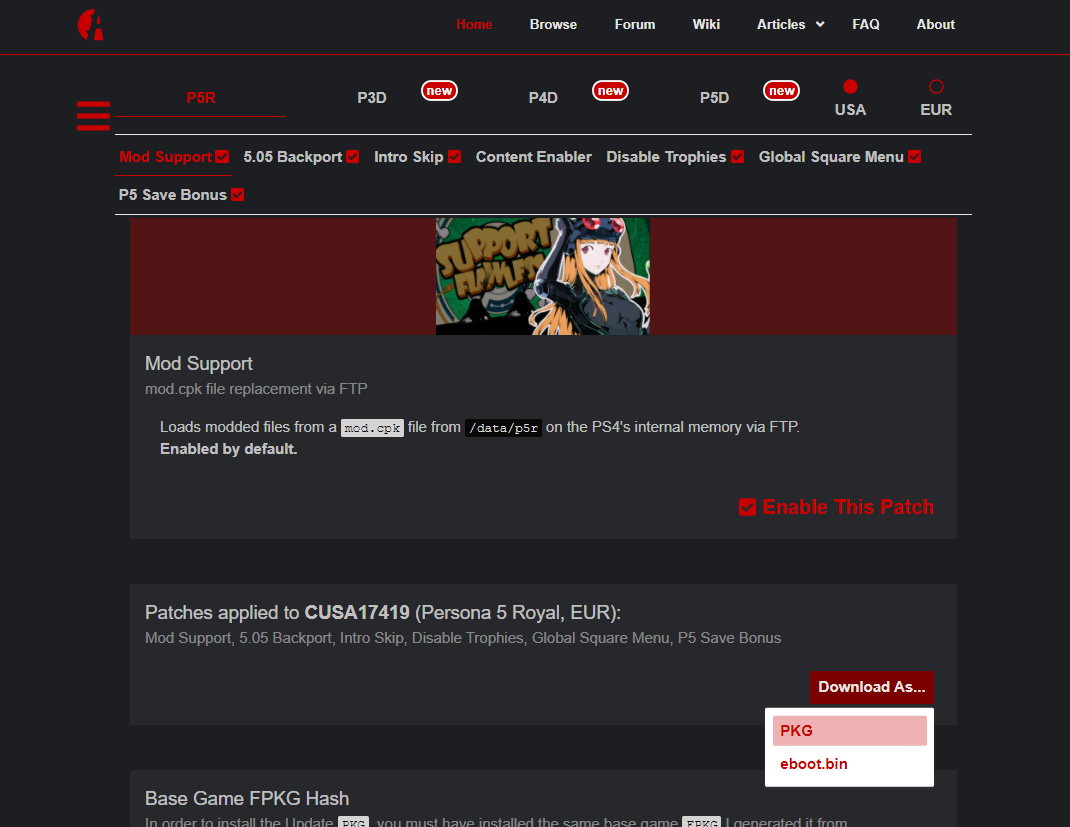
To accommodate this change, I pre-generated certain combinations of patches for each game as .PKG files. You can download one based on your preferences and simply install it via the Settings > Debug Settings > Package Installer when you’re running HEN on an exploitable PS4 console.
Then, to override files with modded ones, use FTP to send a mod.cpk generated by the latest Mod Compendium to a specific directory on the PS4, and start the game. You can replace this mod.cpk at any time to update the modded files you’re using, or delete it in order to use the game’s vanilla files again.
You may also choose to download the pre-generated patch as an eboot.bin instead of a .PKG, and create your own modded update .PKG manually.
Why Do It Manually?
Unfortunately, while convenient for many, this is not a one-size-fits-all solution.
- You need to use a FPKG. If you read our article on Installing Persona Mods on PS4, you’d know that FPKGs are unofficially repackaged games that can only run while you’re using HEN on an exploitable PS4 console.
There is no other way to install modded updates than to install the base game from one of these unofficial .PKG files, since the encryption keys need to match. While the encryption keys for retail (PSN/disc-based) games are unknown, a FPKG’s keys are generally zero. - You need to be using the same FPKG the Update PKG was generated from.
Unfortunately, not all FPKGs are equal, even if the files and region match. An update will fail to install if it is not based on the exact same base game .PKG.
You can install a tweak such as HashTab on your Windows PC to right click your FPKG and go toProperties > File Hashesand see if they match mine. When you download a pre-generated .PKG from my Update Creator, you’ll see the hashes (CRC32, MD5, SHA-1) you can compare yours to. - You might want a different set of patches.
I combined many of the patches into single downloads so that I would have exponentially fewer pre-generated .PKG files to upload and keep track of. I tried to logically group together quality of life improvements i.e. mod loading, intro skip, global square button, disable screenshot overlay, since I didn’t see why the average user wouldn’t want them.
Things like disabling DLC messages and trophies are therefore kept separate, and experimental patches that only benefit mod developers in very specific situations are omitted altogether.
But if you still wanted a different combination of patches than what is available by default, you would have to patch your eboot.bin yourself, and go through the process of building your own update .PKG. - Maybe the files are offline.
Stuff on the internet goes down all the time for various reasons, so if the Update Creator is broken and hasn’t been updated, hopefully the contents of this guide still suffice.
Patching the EBOOT
The eboot.bin is the executable of the game: the main program that runs when you launch it. Reverse engineers like Lipsum decompile the code in order to change certain regions of the binary, resulting in different behavior. This process is known as “patching.”
For the end user, applying these patches requires you to run a couple Python scripts. But before we can do that, we need the eboot.bin.
Extracting Required Files from the FPKG
At this point I’m assuming you have the base game FPKG, since you need one to generate the Update .PKG later. It also needs to be installed on the PS4 for the Update .PKG to work, for reasons discussed earlier. If you need to find an FPKG, look no further than Google.
You can also create your own FPKG from files dumped from your legit copy of the game.
Disclaimer: Installing unofficial titles, whether you have purchased the game or not, is still a violation of Sony’s EULA and they reserve the right to terminate your account or ban your console. This doesn’t mean that they will, but you should be aware of the risk. Do your research on the likelihood of being banned before proceeding if this matters to you.
Also– a game installed via an FPKG can only run on HEN, so if you lose access to the jailbreak by updating, you also lose access to your repackaged games and mods.
You may choose to block Sony’s servers using a custom DNS if you don’t intend on using PSN, just to be a bit on the safer side. This may also help prevent automatic updates from downloading for FPKG games.
DOWNLOAD: PKGEditor
I’ll use Persona 3: Dancing in Moonlight (USA) as an example.
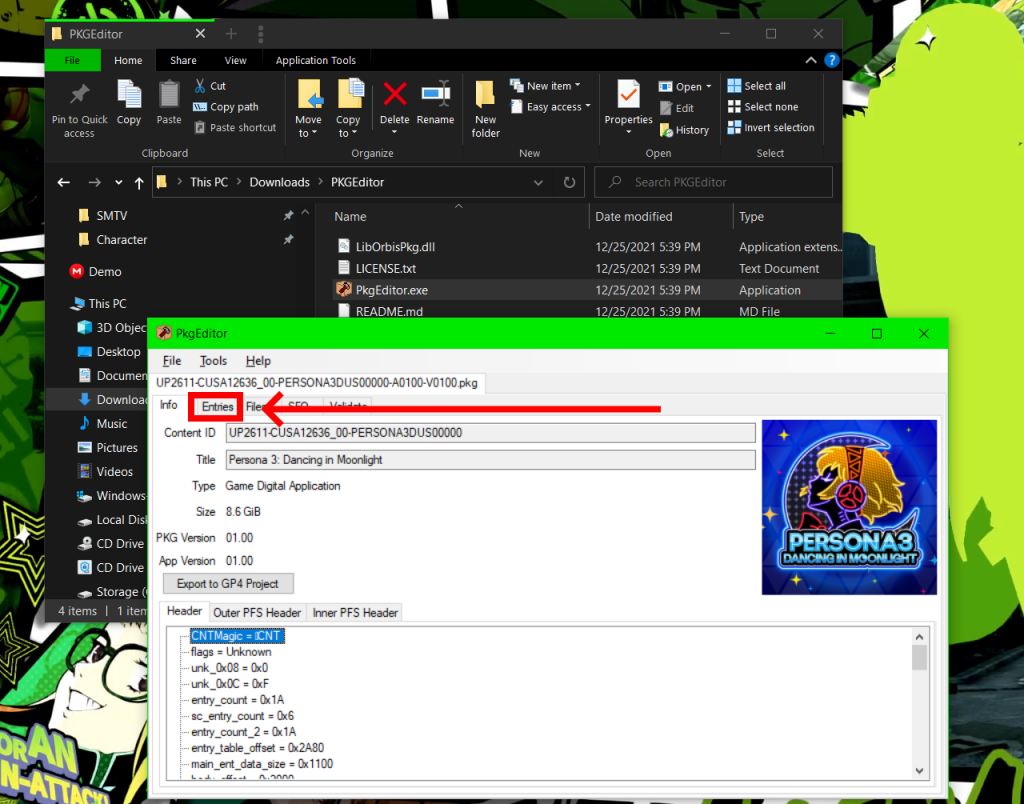
Open up the FPKG in PKGEditor. Click on the “Entries” tab.
Right click and “Extract and Decrypt” both of the following files:
- nptitle.dat
- npbind.dat
Put them somewhere safe for now, and click on the “Files” tab.

Right click and “Extract” the file eboot.bin.
Un-Fakesigning the ELF
Before we can apply the patches, we must use a python script called ps4_unself.py to “un-fakesign” the eboot.bin‘s .ELF. This is usually necessary in order for the eboot.bin from an FPKG to be recognized by the script that applies the patches in the next step.
Note: You can skip this step in the case of P5R, since the patcher only works with the Update 1.02 eboot.bin, which is unlikely to be included in an FPKG or dumped from a firmware lower than 9.00 due to firmware requirements. Grab a fresh v1.02 eboot.bin from here and continue on to Applying Desired Patches. This one is already un-fakesigned since it’s from an official update.
DOWNLOAD AND INSTALL: Python 2.7 (not 3!!!)
ALSO DOWNLOAD: ps4_unself.py

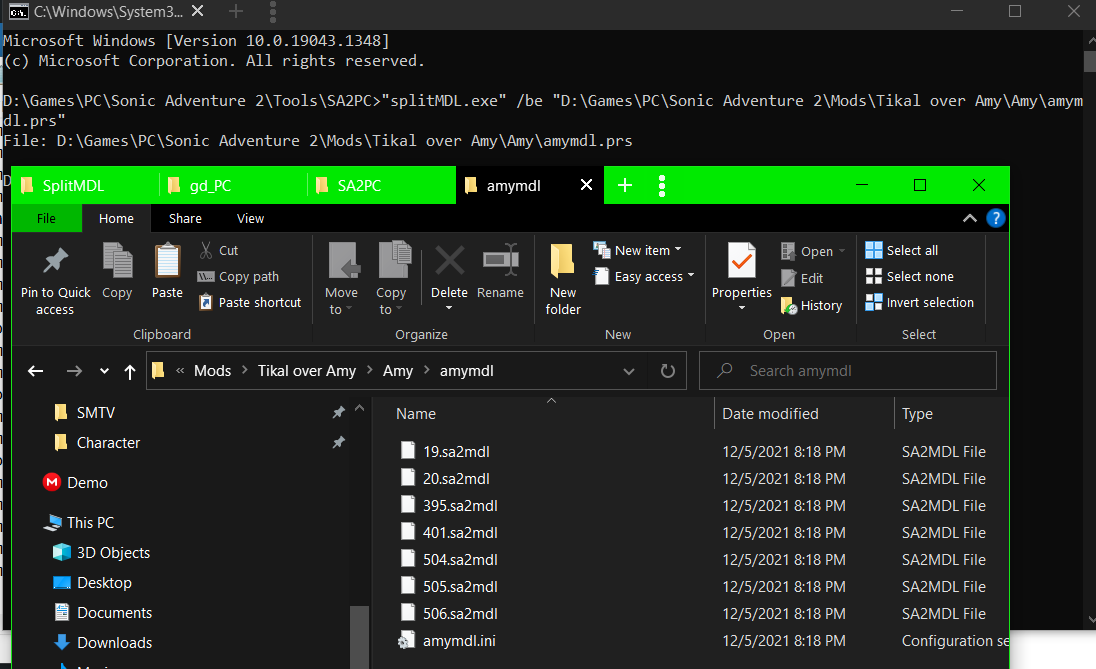
Type in “cmd” in the Windows explorer address bar and press enter to start the Command Prompt pointed at the current folder.
Enter the path to your python 2.7 exe, followed by script and the eboot.bin file. Press ENTER and the magic should happen, resulting in an eboot.elf file.
Applying Desired Patches
Almost in the homestretch! Let’s download the entire ppp repository from zarroboog’s GitHub.
DOWNLOAD: ppp
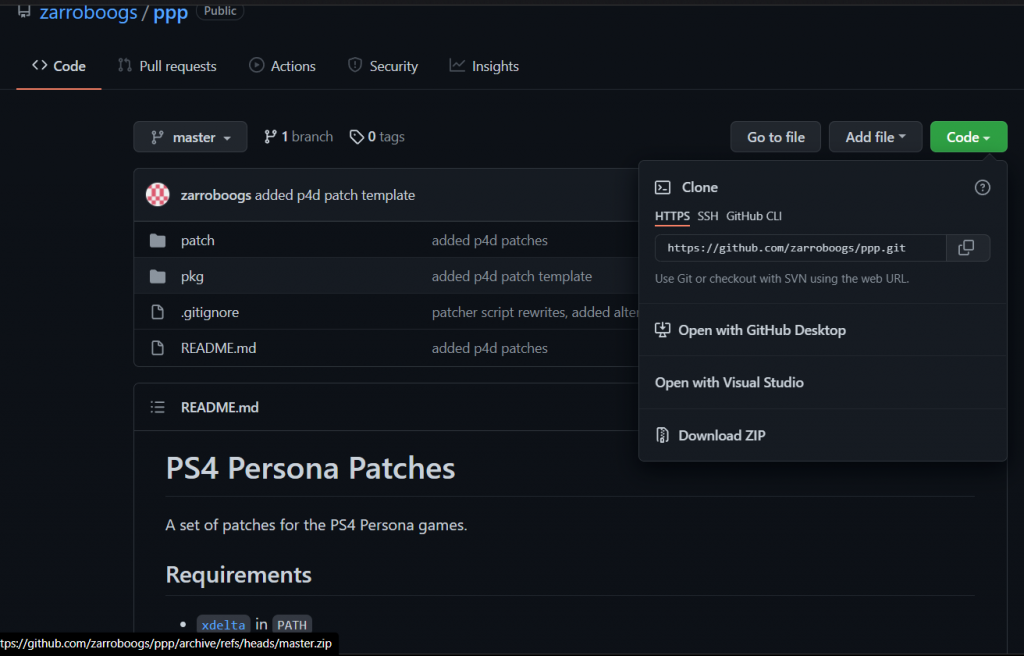
Unzip the contents (folders named patch and pkg) to the folder you’re working in.

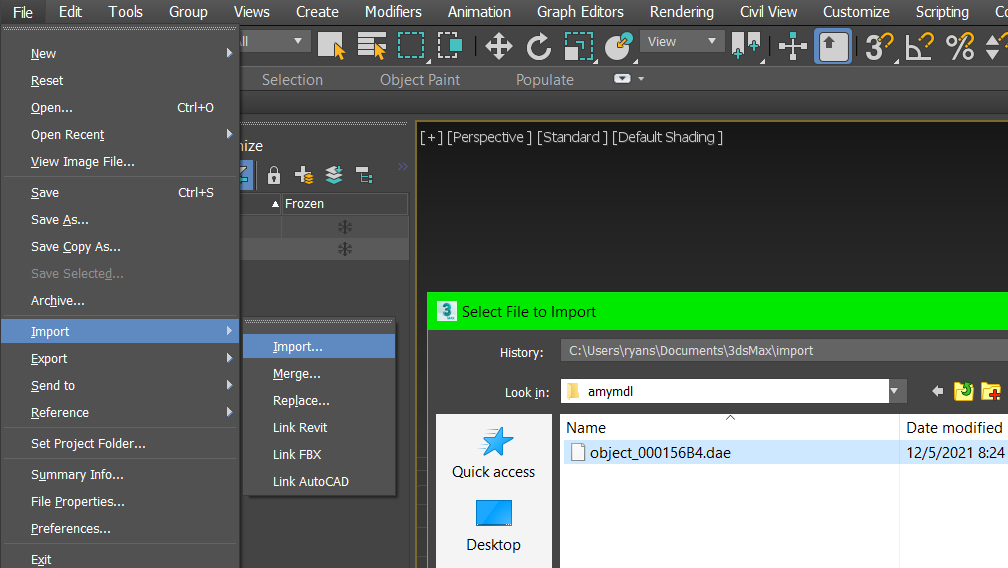
Move the eboot.elf file into the patch folder.
Note: If you’re using an eboot.bin dumped from an official copy of a game/update rather than an FPKG, and therefore didn’t have to un-fakesign it using the Python script in the previous step, the file we’re referring to as eboot.elf here may still be named eboot.bin in your case. You can rename it to eboot.elf to avoid confusion, or substitute the actual extension in these next steps as appropriate.
Before we carry out the patching process, let’s take care of one last thing real quick.
DOWNLOAD: xdelta3.exe
One of the requirements of patch.py is to have “xdelta” in “PATH.”
If you’re wondering what the heck that means, go to your C:\ Drive in Windows Explorer and create a new folder named .bin.

Copy xdelta3.exe to the .bin folder and rename it to xdelta.exe.

In Windows Search, type “path” and you should see the option “Edit environment variables for your account” pop up.
Click on that.
This will bring up the System Properties window in the Advanced tab.
Click on the “Environment Variables” button at the bottom.

In the window that pops up, choose “Path” and click the “Edit” button.

Click the “New” button and add “C:\.bin\“.
Press OK and close out of all these windows.
If you have the Command Prompt open still, close it.

Type “cmd” in the Explorer address bar again and open the command prompt to the “patch” folder.
This time, supply the path to Python 3 instead of 2.7 (yes, you have to install another separate version of Python).
DOWNLOAD & INSTALL: Python 3
After that, enter the path to patch.py and eboot.elf. Press Enter and it’ll show you the available patches for the title, assuming the .ELF is recognized (it must be un-fakesigned and a supported region and game version).
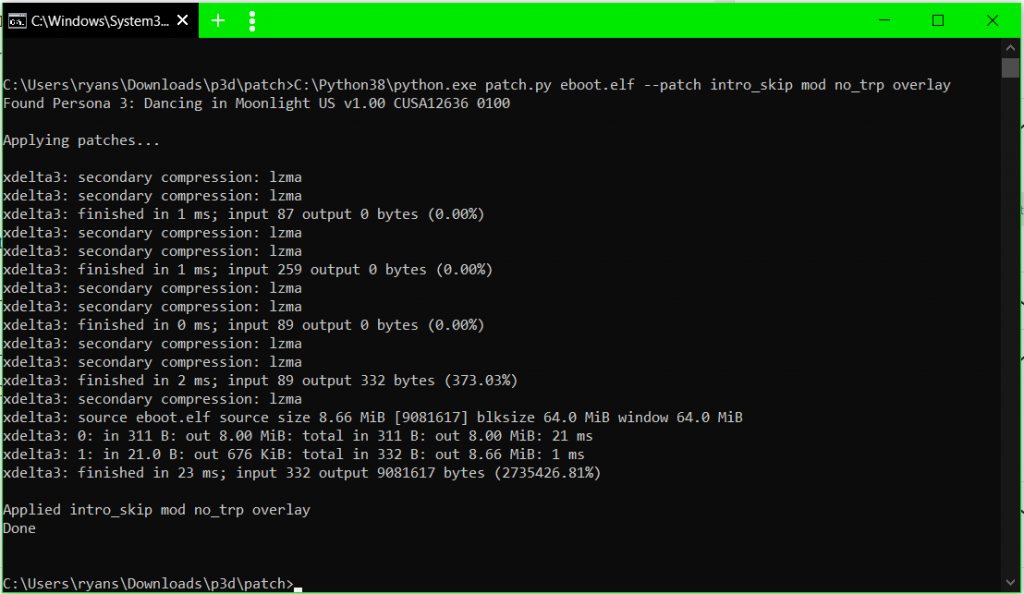
Press up on the keyboard to copy the line you entered previously, and add “–patch” followed by the names of the patches you want. Press Enter again, and a file should be generated with the patches applied: “eboot.elf--patched.bin.”
Preparing the Update PKG Contents
Now that we’re done with the patch part of this procedure, let’s move on to the .PKG.
Pick the .7z from the ppp pkg folder and extract the contents somewhere with 7-zip.

In this case, CUSA12636.7z, which contains the folder patch0101 and the file patch0101.gp4.
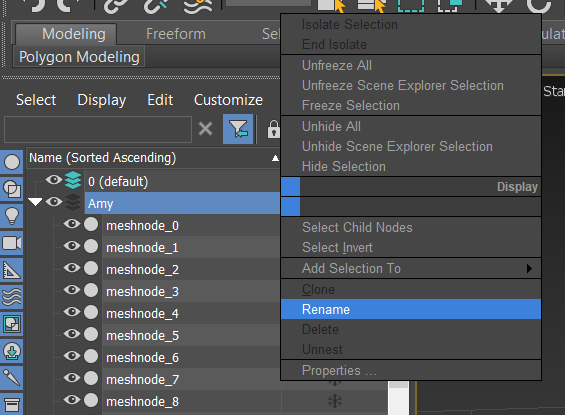
Inside the patch0101 folder, replace the zero-byte eboot.bin with the patched .ELF we made in the previous step. Delete the old one and rename the new one to eboot.bin.

Inside sce_sys, also replace the zero-byte nptitle.dat and npbind.dat files with the ones we extracted earlier.
Optional: Replace the mod.cpk in the data folder with one you generated from the Mod Compendium. You do not need to do this if you intend to do so later with FTP, but either way, the FTP one can override this one anyways. So there’s not much of a point unless you’re never going to use FTP or change the modded files, it just increases the PKG size.
For Persona 5 Royal, you’ll also need the Update v1.02 .CPK files, which go in the USRDIR folder. These files prevent a crash when you start a new game. You also won’t be able to build the .PKG in the next step otherwise since it’ll complain about missing files.
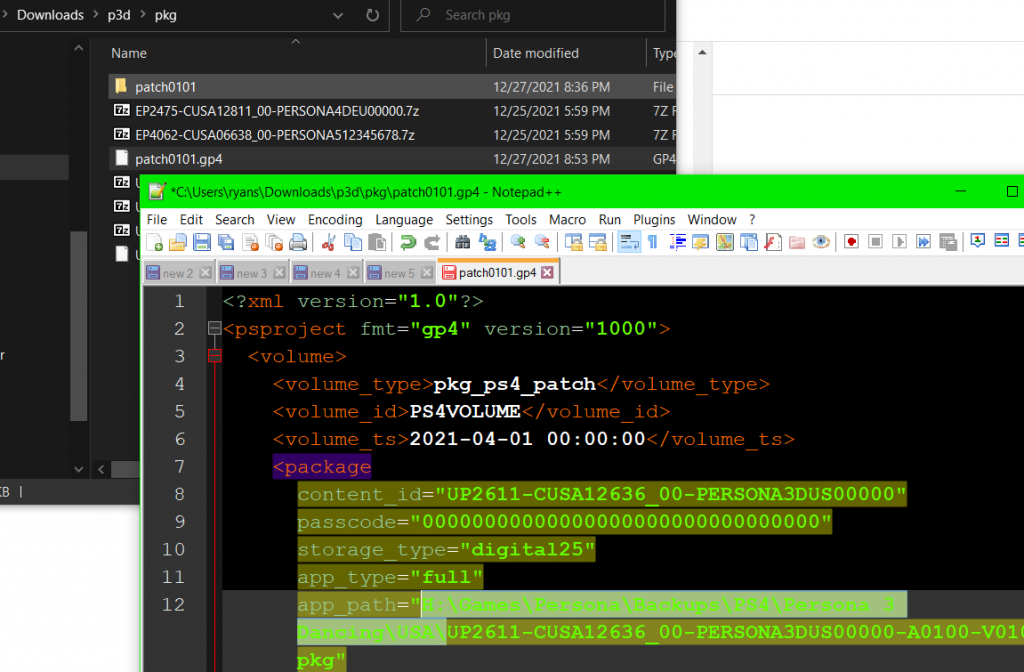
Almost done here. Right click and edit the .gp4 file and replace the line app_path="UP2611-CUSA12636_00-PERSONA3DUS00000-A0100-V0100.pkg" with a full path to your game’s base FPKG. For example, app_path="C:\Users\Me\Documents\UP2611-CUSA12636_00-PERSONA3DUS00000-A0100-V0100.pkg".
Generating the Update PKG
Now that our folder is prepared, we can convert it into an Update .PKG using the following files. Unzip the contents to the folder containing your patch0101 folder and .gp4 file.
DOWNLOAD: img_create.zip
Right click and edit the img_create.bat file, and change “patch.gp4” to the name of the .gp4 file we’re working with: in this case, patch0101.gp4. Save and close. Then double-click it to run the command.
What should happen is, a command prompt window will appear displaying the progress of the .PKG generation. But if it appears to do nothing, or quickly open and close, try dragging the .bat file into a Command Prompt window and press Enter to see if it gives you any errors (likely related to missing files or paths).
Simply create the missing temp or pkg folder in the same directory containing the .bat if this happens, and try again.
It’s normal if this window gets stuck at a little over 80%, since it’s verifying the integrity of your newly generated .PKG by comparing it to the original base game one. This step can take awhile and is completely optional, so it’s safe to close the window and copy the output .PKG to a USB stick for installation.
For the Dancing games, this .PKG is usually at least 13 MB, but for P5R it should be at least 800 MB due to the v1.02 update files for each language and the mod.cpk.
Well, that covers everything I can think of right now!
Any further info regarding this process, such as installing the game and running HEN should already be addressed by our other PS4 Persona Modding Guide, but if not, you’re welcome to seek assistance in the Troubleshooting and Q&A Forum.